A simple wound is a break in the continuity of the skin limited in depth at the sub-cutaneous fatty tissue, that does not affect the underlying structures (muscle, bone, joints, major arteries, nerves, tendons) and without significant loss of tissue.
The goal of treatment is to assure rapid healing of the wound without complications or sequelae. Several basic rules apply:
- rapidly treat wounds, while maintaining the rules of asepsis and the order of the initial procedures: cleaning-exploration-excision;
- identify wounds that need to be sutured and those for which suturing would be harmful or dangerous;
- immediately suture recent, clean, simple wounds (less than 6 hours old) and delay suturing contaminated wounds and/or those more than 6 hours old;
- prevent local (abscess) or general (gas gangrene; tetanus) infections.
Equipment
Instruments
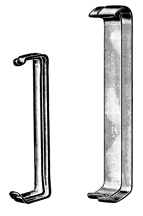
(Figures 1a to 1d)
- One dissecting forceps, one needle-holder, one pair of surgical scissors and one Pean or Kocher forceps are usually enough.
- One or two other artery forceps, a pair of Farabeuf retractors and a scalpel may be useful for a contused or deep wound.
Instruments to suture one wound for one patient must be packaged and sterilised together (suture box or set) to limit handling and breaks in asepsis.
Renewable supplies
- For local anaesthesia: sterile syringe and needle; 1% lidocaine (without epinephrine)
- Sterile gloves, fenestrated sterile towel
- Sterile absorbable and non-absorbable sutures
- Antiseptic and supplies for dressings
- For drainage: corrugated rubber drain or equivalent, nylon suture
Technique
- Settle the patient comfortably in an area with good lighting and ensure all the necessary material is prepared.
- Explain the procedure to the patient and ensure his co-operation.
- If the patient is a young child, arrange to have an assistant hold the child if necessary.
Initial cleaning
- Wear suitable clothing: sterile gloves for all wounds and a gown and protective glasses if there is a risk of projection from a bleeding wound.
- Start by washing the wound, prolong the cleaning if the wound is particularly soiled. Use ordinary soap or 7.5% povidone iodine scrub solution and water and rinse.
- If necessary use a sterile brush. Cleaning with running water is preferable to cleaning by immersion.
- If the wound is infected and the patient has general signs of infection (fever, chills, changes in the overall condition) systemic antibiotic therapy may be required. Administer antibiotics at least one hour prior to starting care.
Exploration
- Wash hands and put on sterile gloves.
- Disinfect the wound and surrounding area with 10% povidone iodine.
- Cover the wound with a fenestrated sterile towel.
- Local anaesthetic: infiltrate 1% lidocaine into the edges of the wound and wait at least 2 minutes for the anaesthetic to take effect.
- Proceed carefully from the superficial to the deepest parts of the wound to explore the extent of the wound, if necessary, aided by an assistant.
- Consider the anatomical location of the wound and look for injury to any underlying structures (the clinical examination of a limb must include evaluation of sensitivity and motor functioning, as well as that of tendons in order to orient surgical exploration):
- a wound that communicates with a fracture is an open fracture,
- a wound close to a joint may be a joint wound,
- a wound on the hands or feet may affect the nerves and/or tendons,
-
a wound close to a major artery may be an arterial wound even if it is no longer bleeding.
- Look for and remove any foreign bodies.
- In the event of significant pain or bleeding, the exploration must be completed in an operating room.
Wound excision
- The goal of the excision is to remove non-viable tissue, which favours the proliferation of bacteria and infection.
- The wound may require little or no excision if it is clean. The excision is more extensive if the wound is bruised, irregular or extensive.
- Limit excision of the skin around the wound, particularly in facial wounds.
- Sub-cutaneous fat and tissue of doubtful viability should be generously excised in order to leave only well vascularised tissue.
Immediate suturing of a simple wound
- Immediate suturing may have serious consequences for the patient if precautions to prevent infection and promote healing are not taken.
- The decision to suture immediately can only be taken after the cleaning, exploration and satisfactory excision, and if the following conditions are met: simple wound, no more than 6 hours old with no devitalised or contused tissue (the wound may be as long as 24 hours old if on the face, scalp, upper limbs or hands).
- Bites (for local treatment see Rabies, Chapter 8) and bullet, shell or mine shrapnel wounds should not be immediately sutured.
Delayed suturing of a simple wound
- Wounds that do not fill the above conditions should not be immediately sutured.
- After cleaning, exploration and excision a simple dressing is applied to the open wound.
- Further cleaning and removal of any remaining necrotic tissue is completed with daily dressing changes.
- If after 72 hours there are no signs of local infection, the wound may be sutured.
Healing by second intention of infected wounds
If the wound does not meet the conditions of cleanliness described above, the wound cannot be sutured. It will heal either spontaneously (healing by secondary intention), or will require a skin graft (once the wound is clean) if there is significant loss of tissue.
Figures 1 : Basic instruments
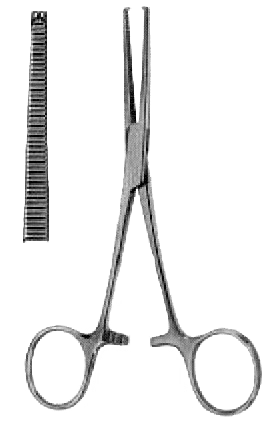
Figure 1a |
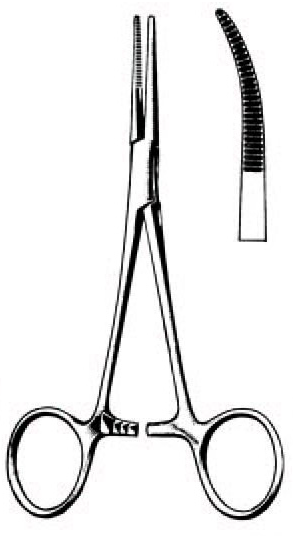 Figure 1b Figure 1b
Kelly forceps, |
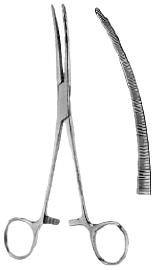
Figure 1c |
|
Figures 2 : How to hold instruments
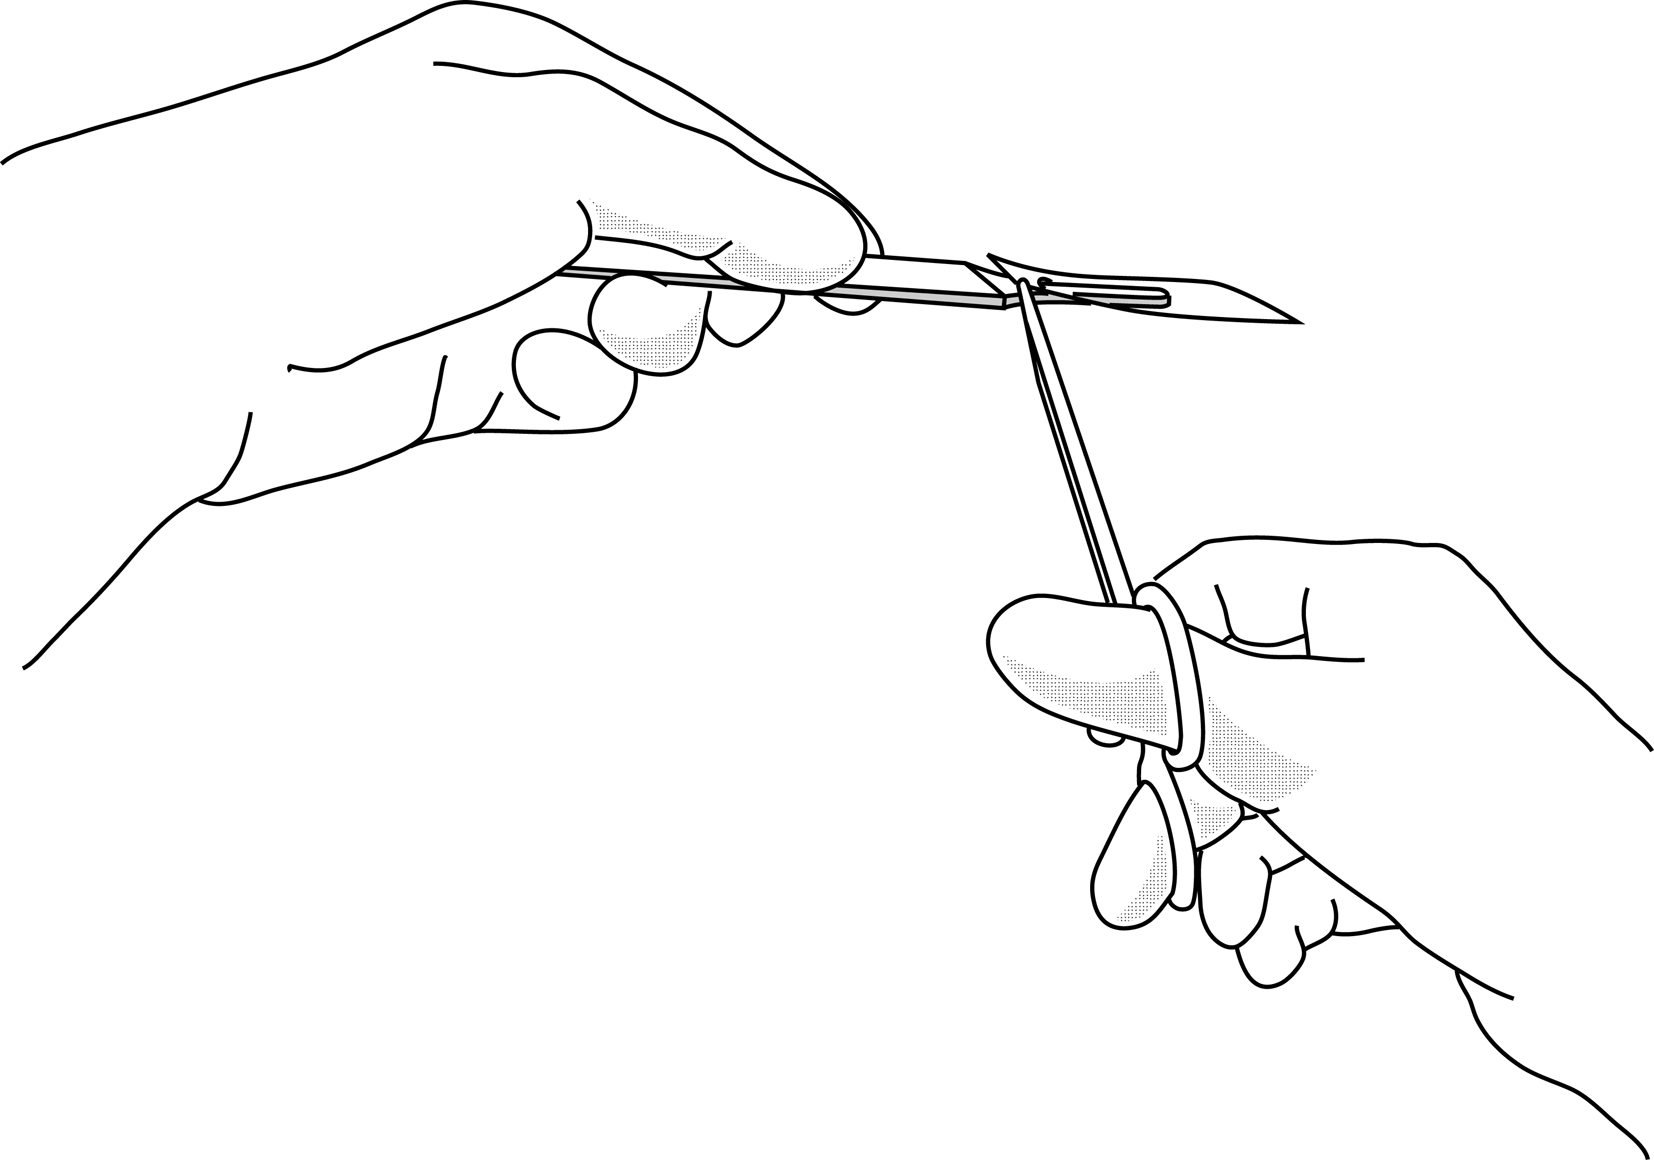
Figure 2a |
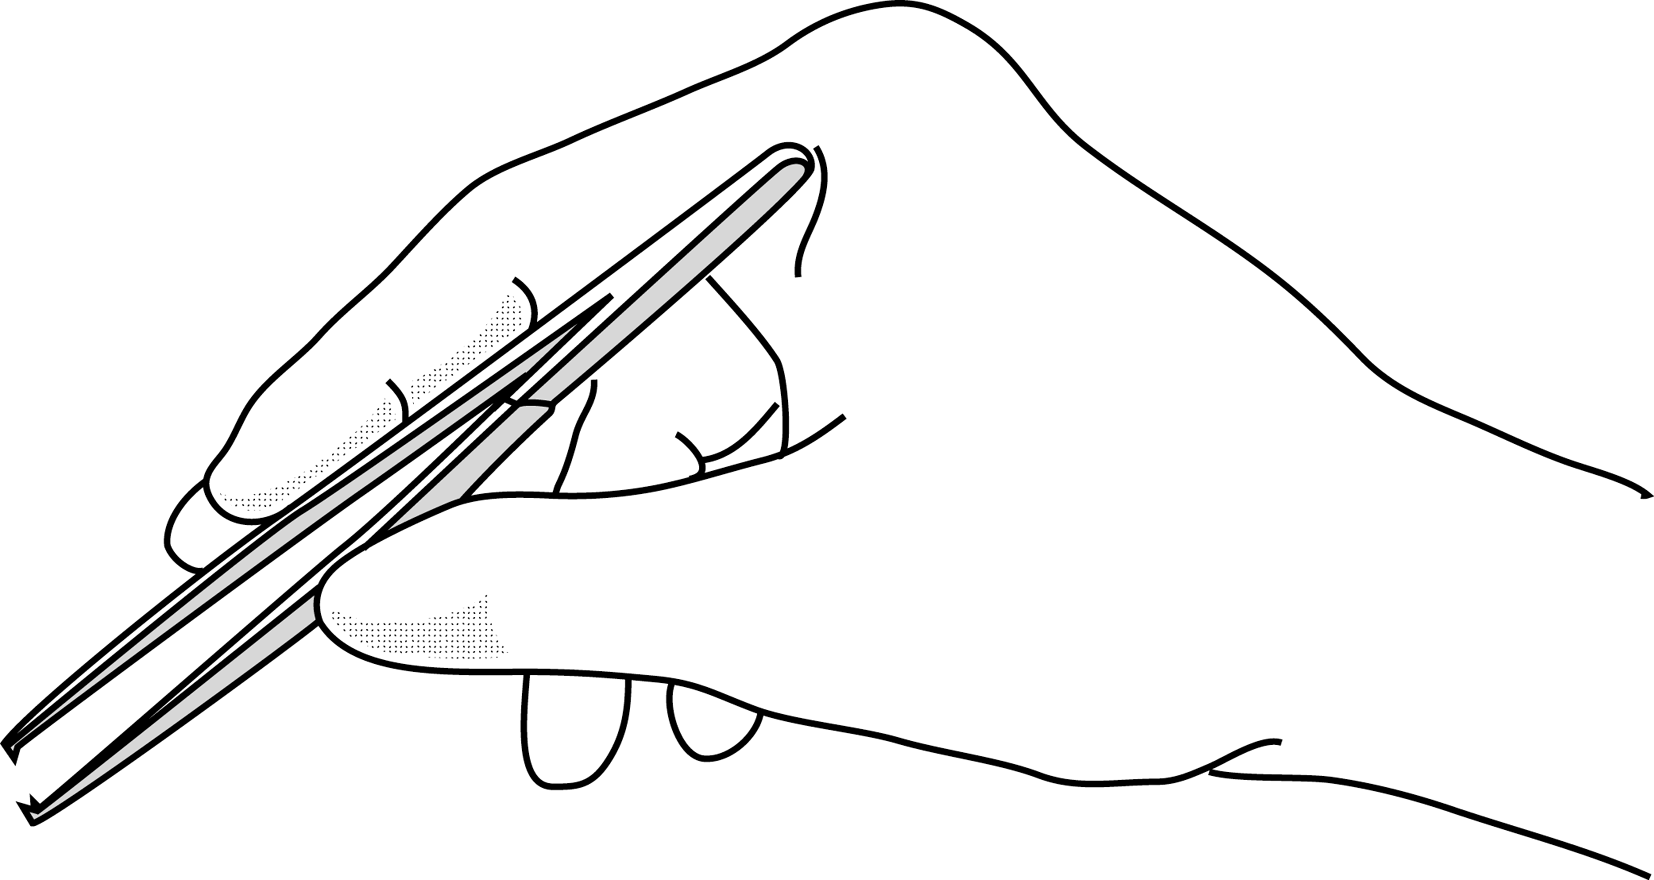
Figure 2b |
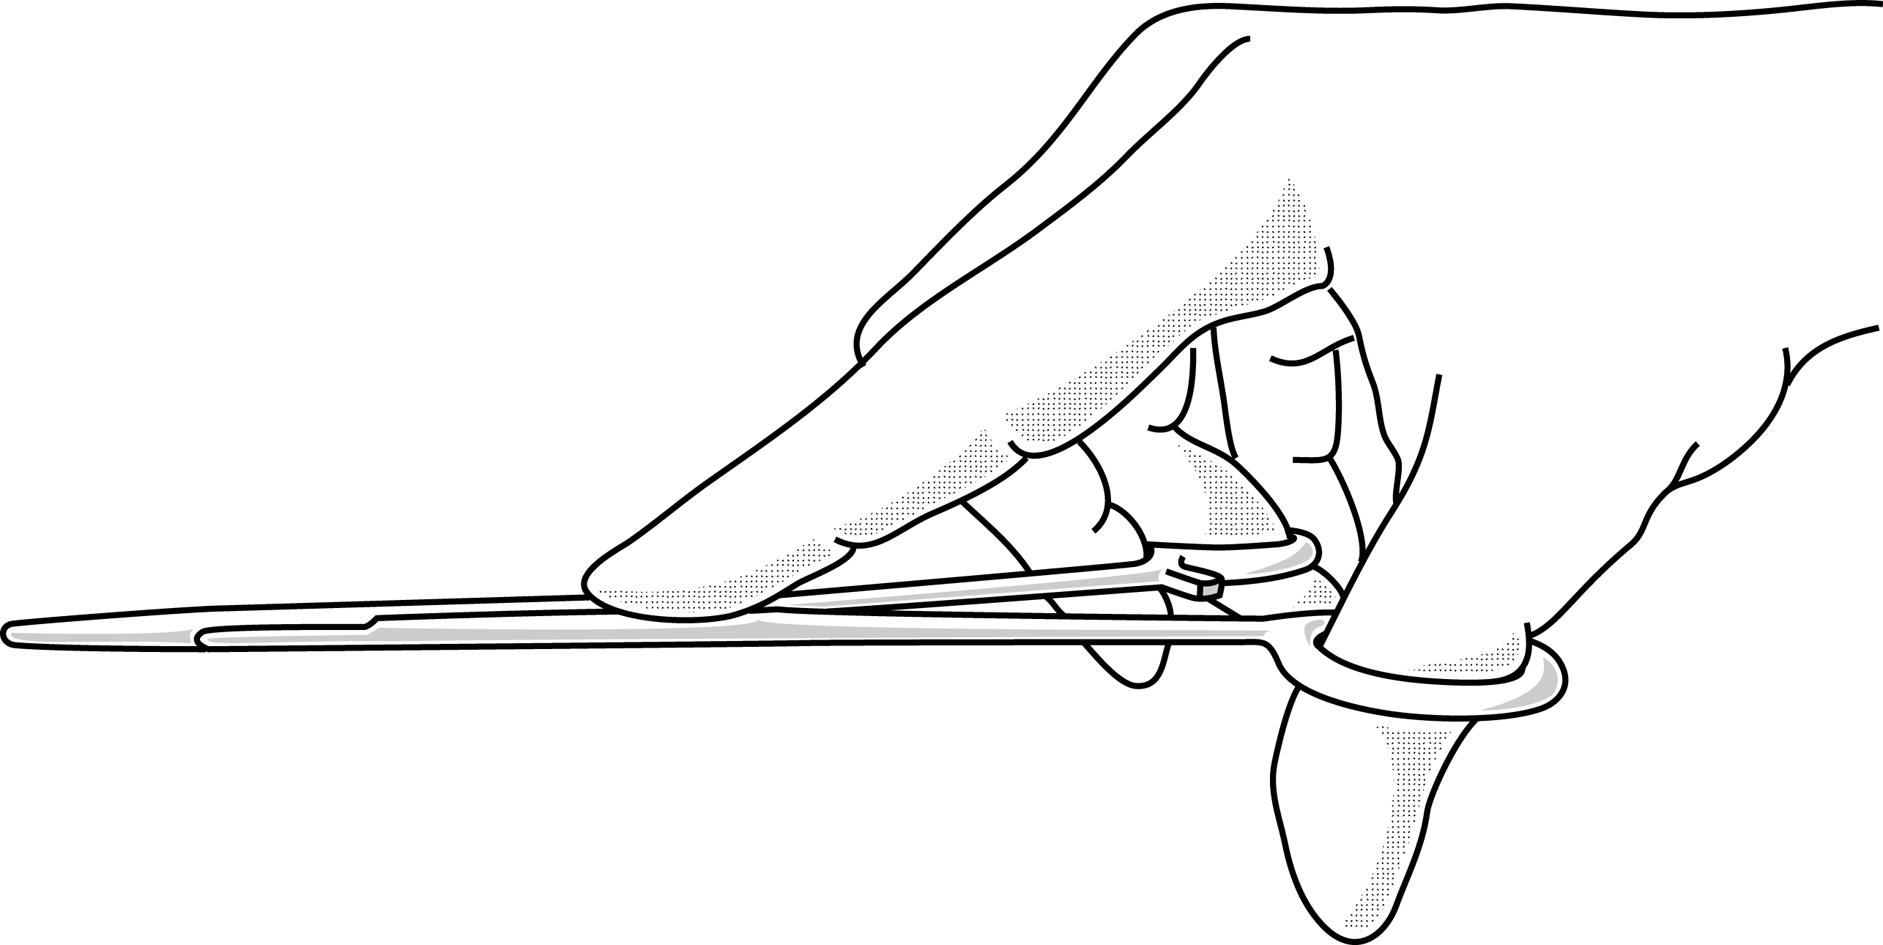
Figure 2c |
Figures 3 : Wound debridement
This should be done sparingly, limited to excision of severely contused or lacerated tissue that is clearly becoming necrotic.
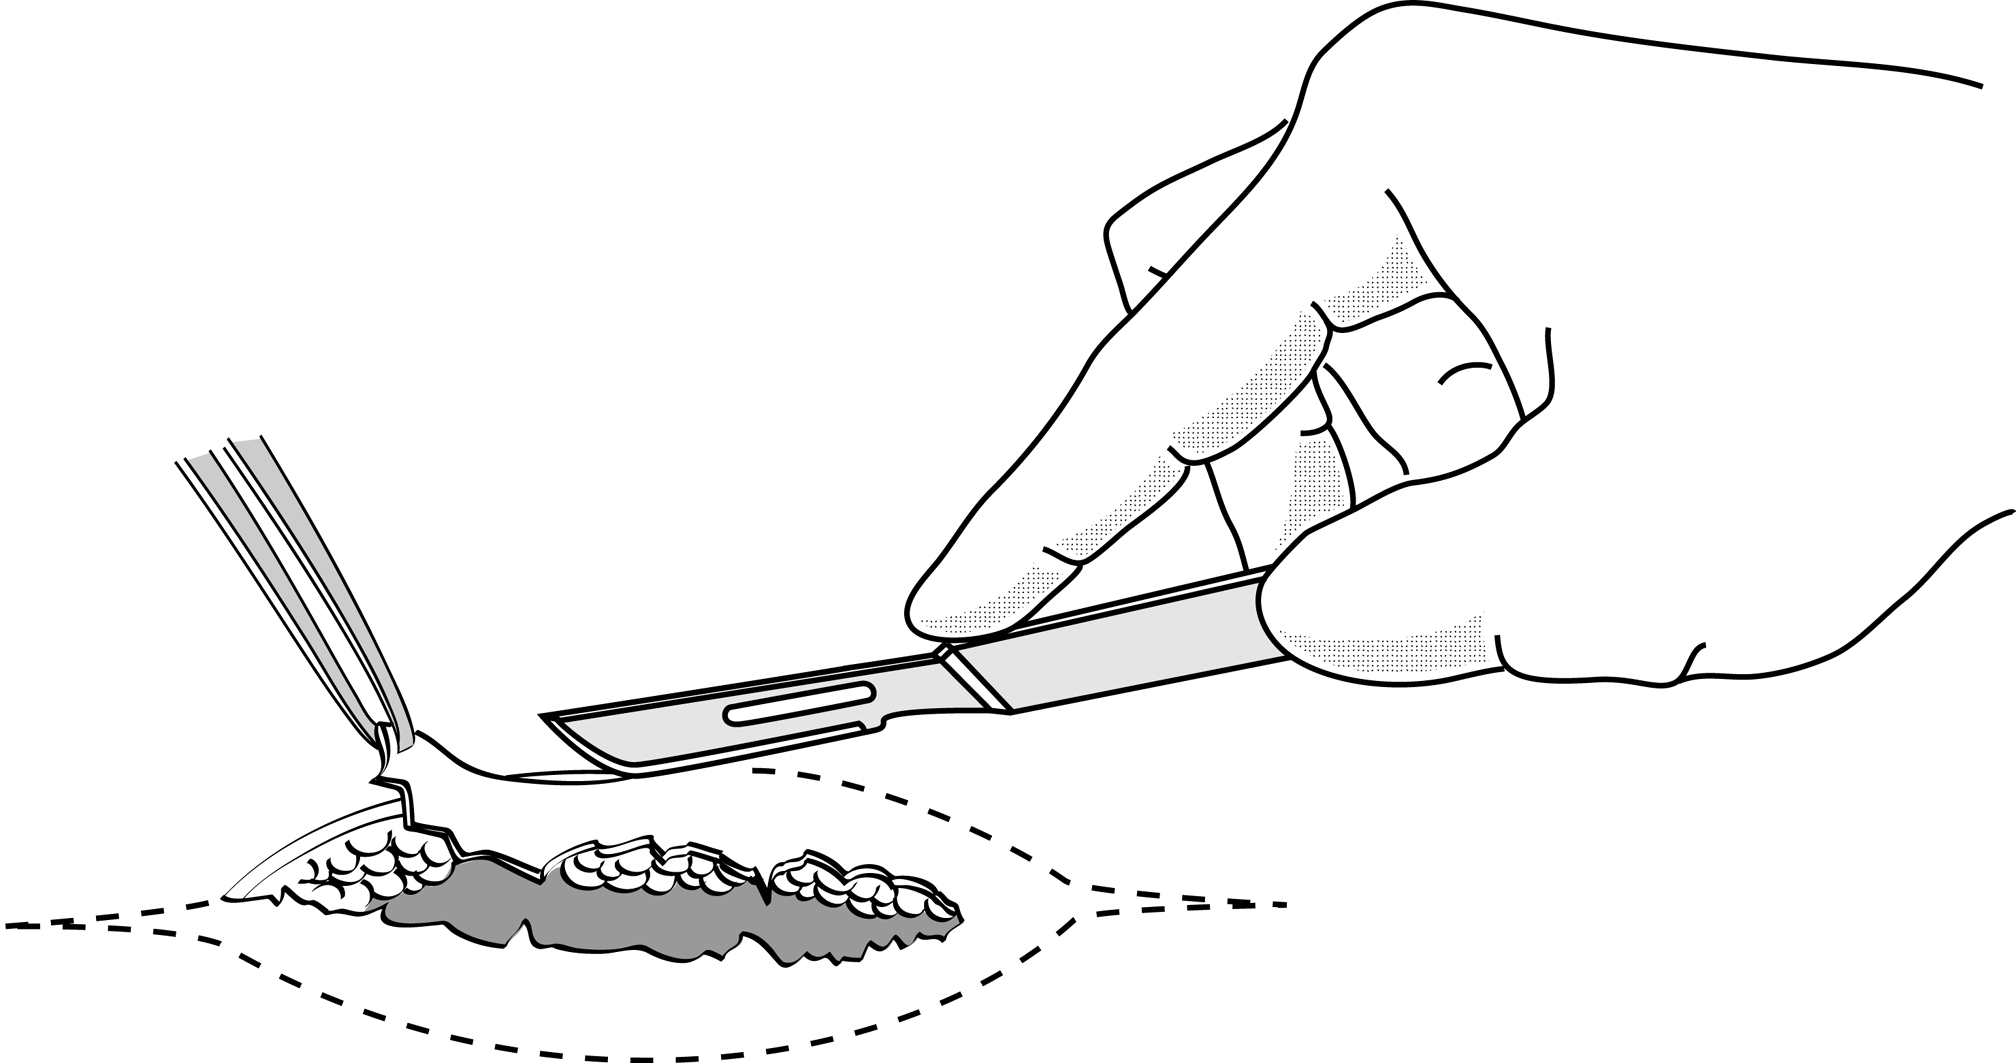
Figure 3a |
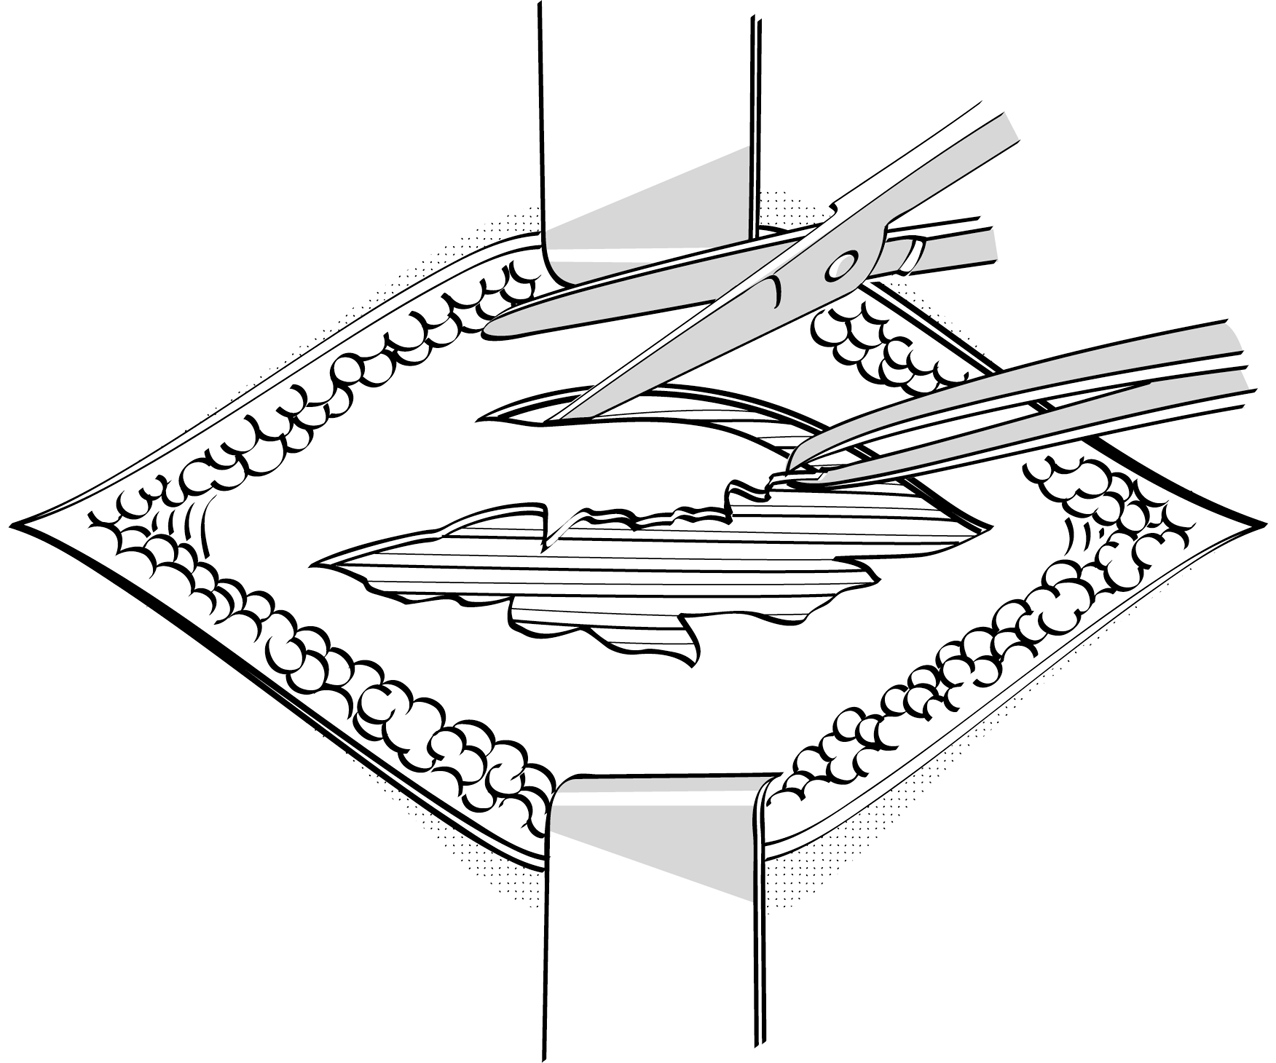
Figure 3b |
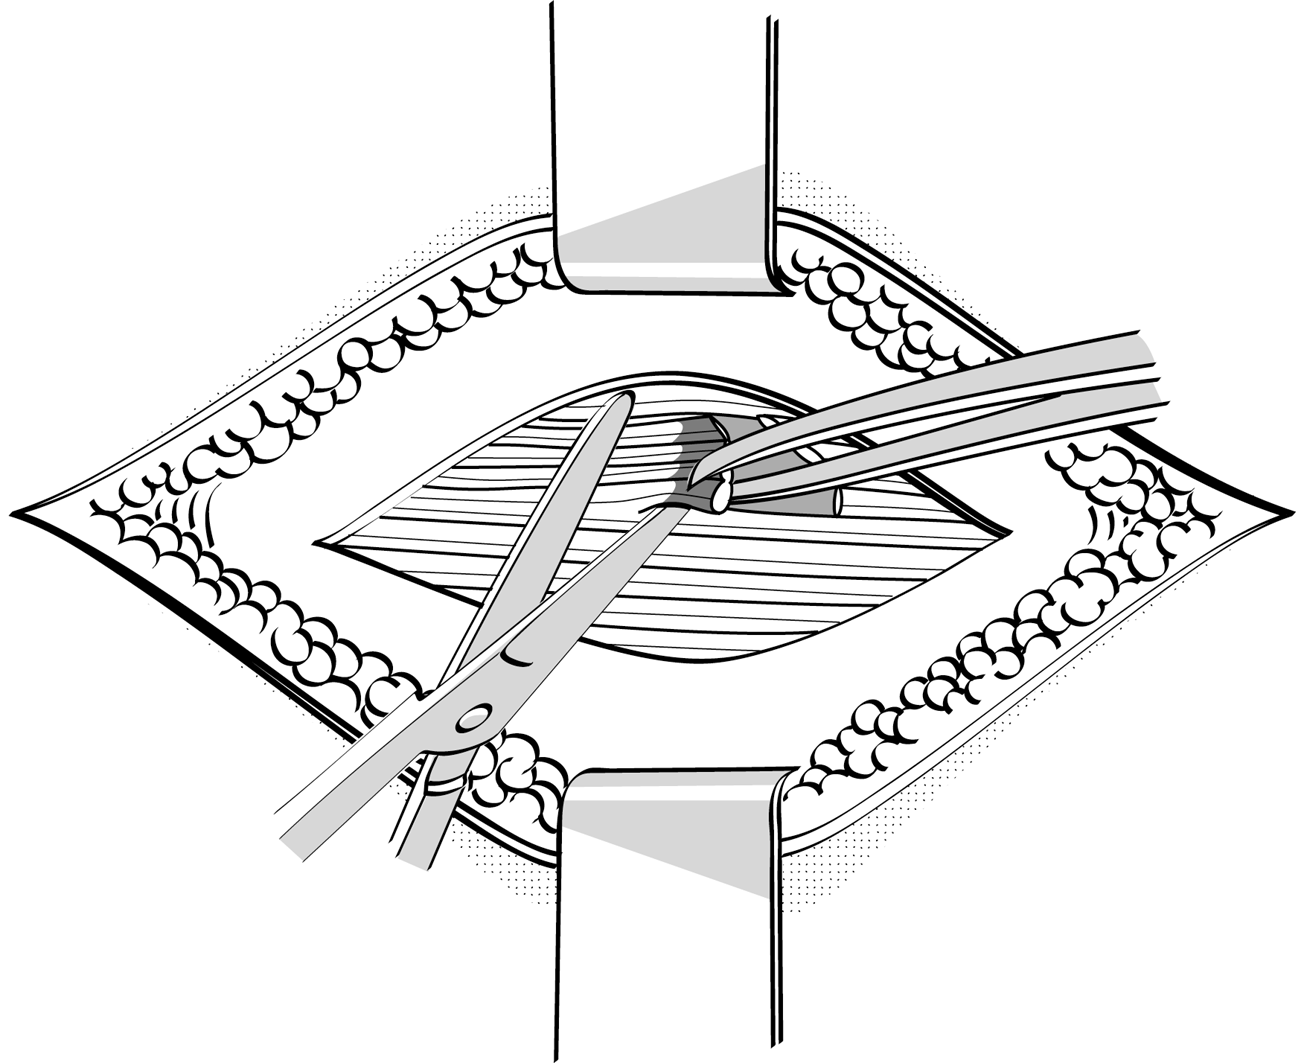
Figure 3c |
Figures 4 : Practising making knots using forceps
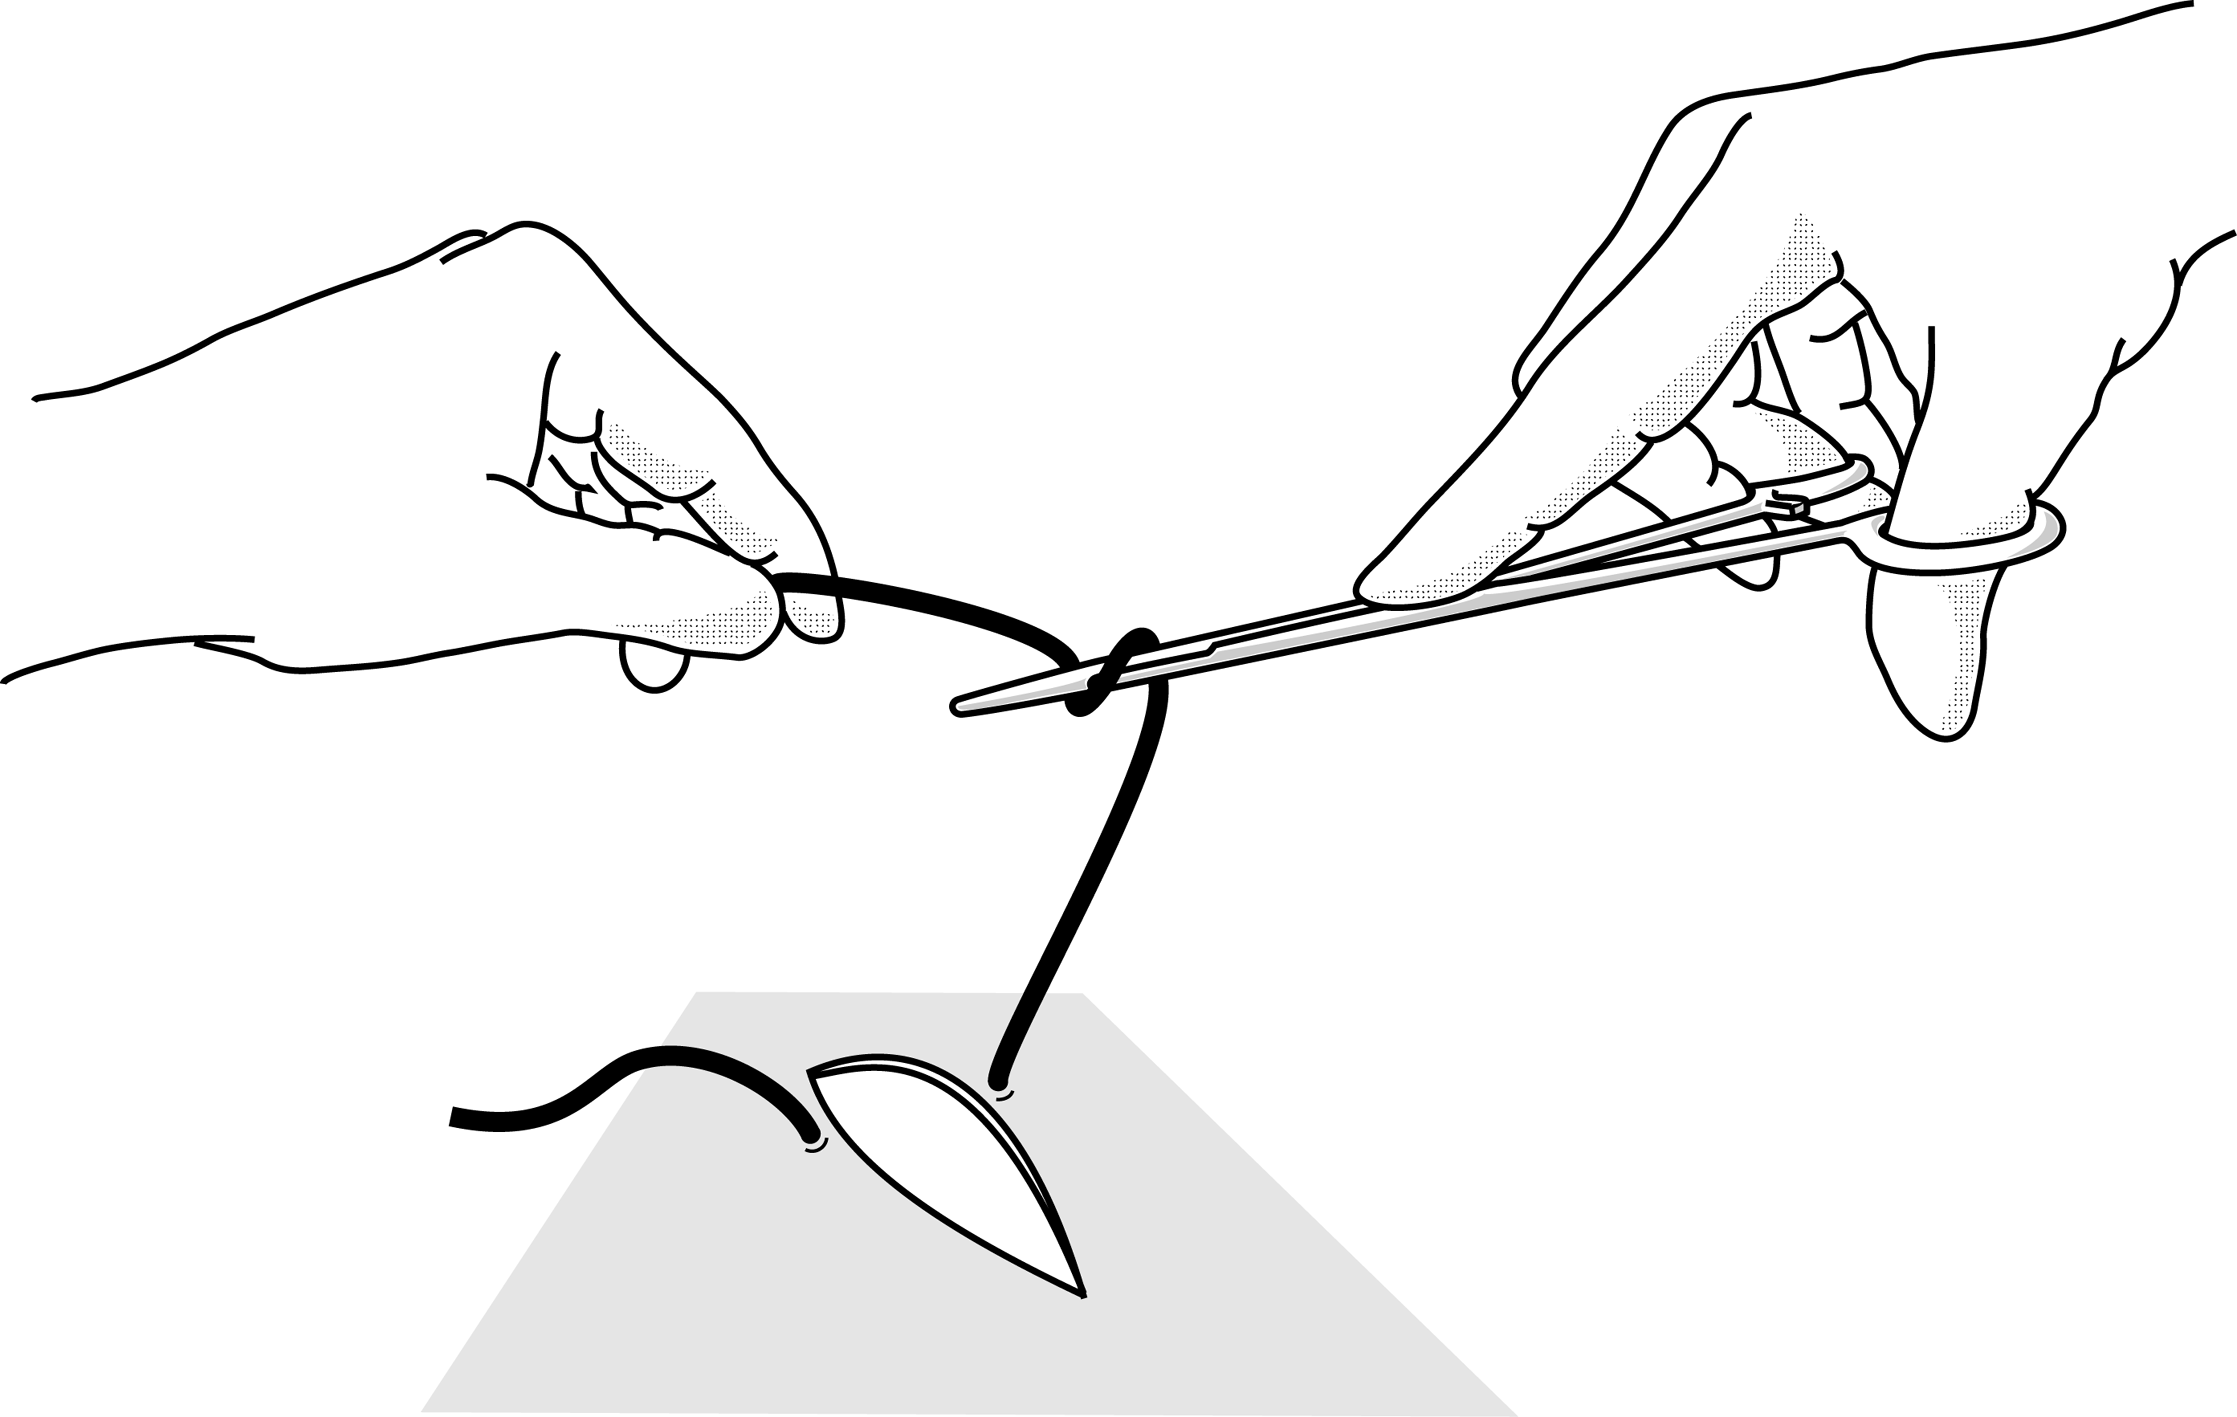
Figure 4a |
|
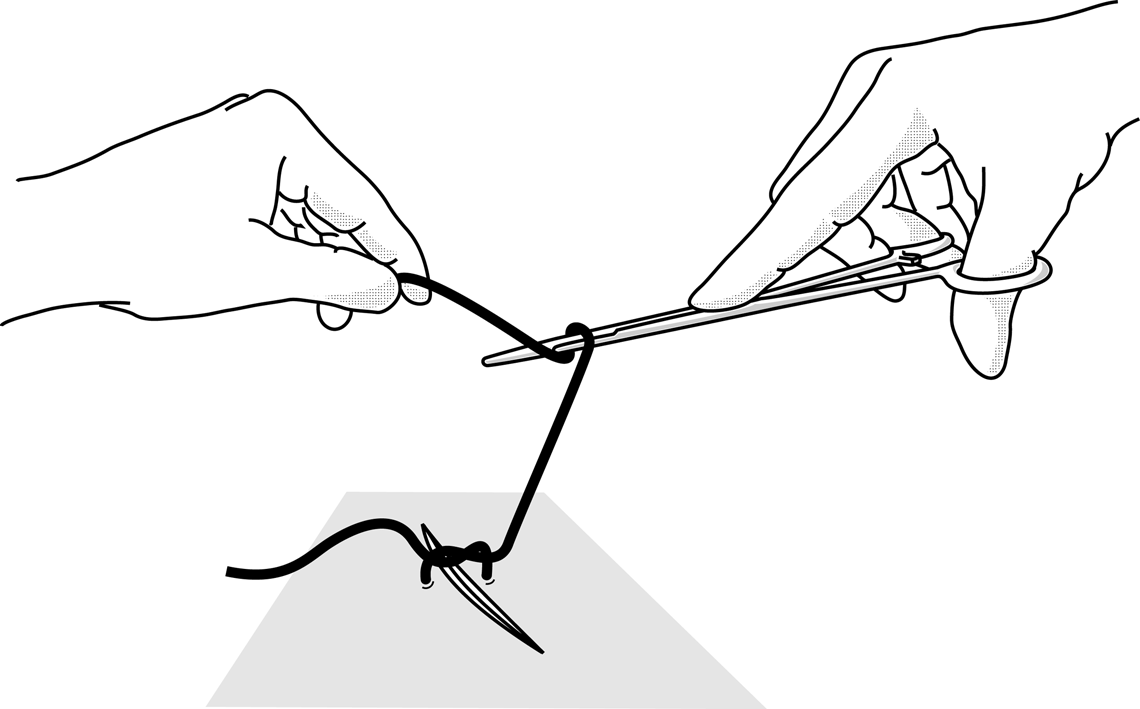 Figure 4b Figure 4b
The second loop should be in the opposite direction. At least 3 knots are needed to make a suture, alternating form one direction to the other. |
|
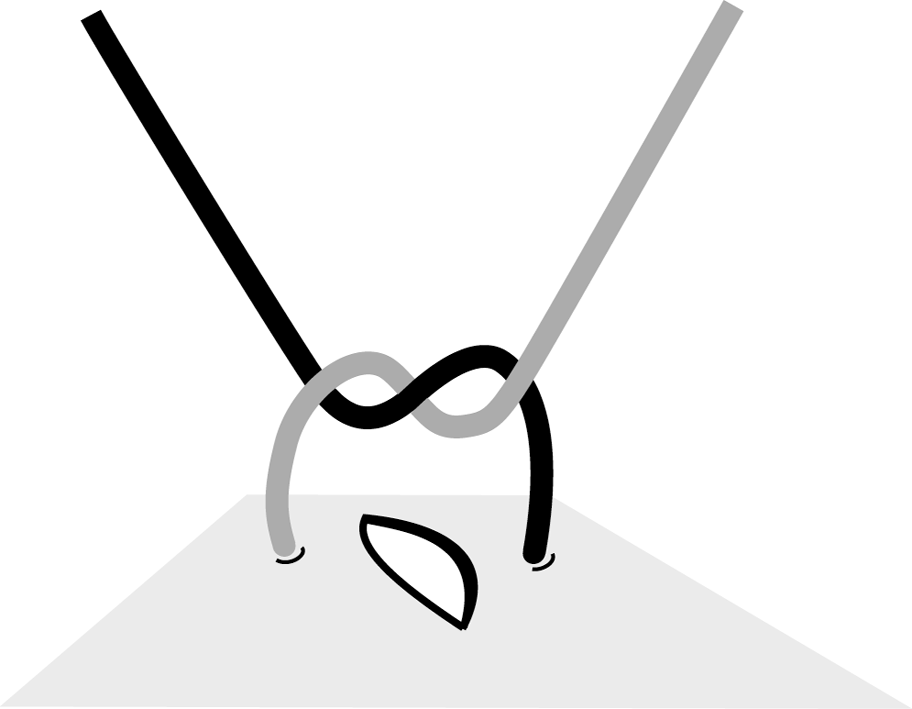 Figure 4c Figure 4c
In principle the first knot lies flat. |
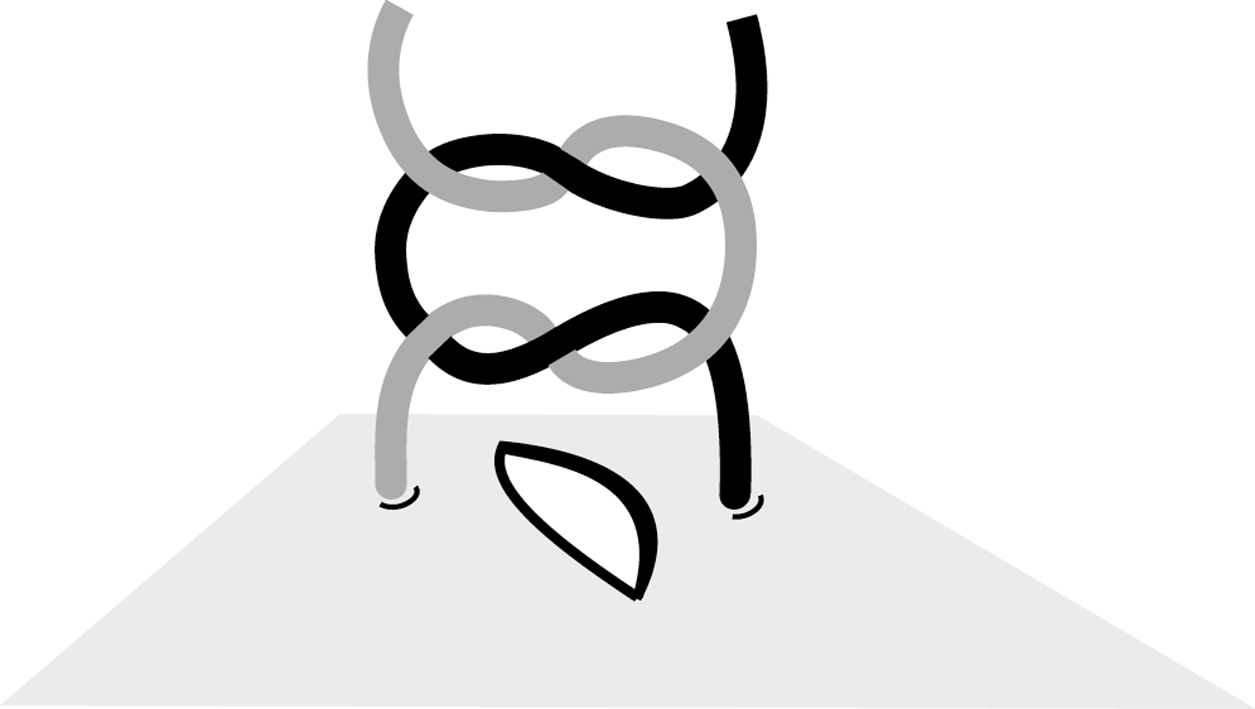 Figure 4d Figure 4d
Second knot in the opposite direction. |
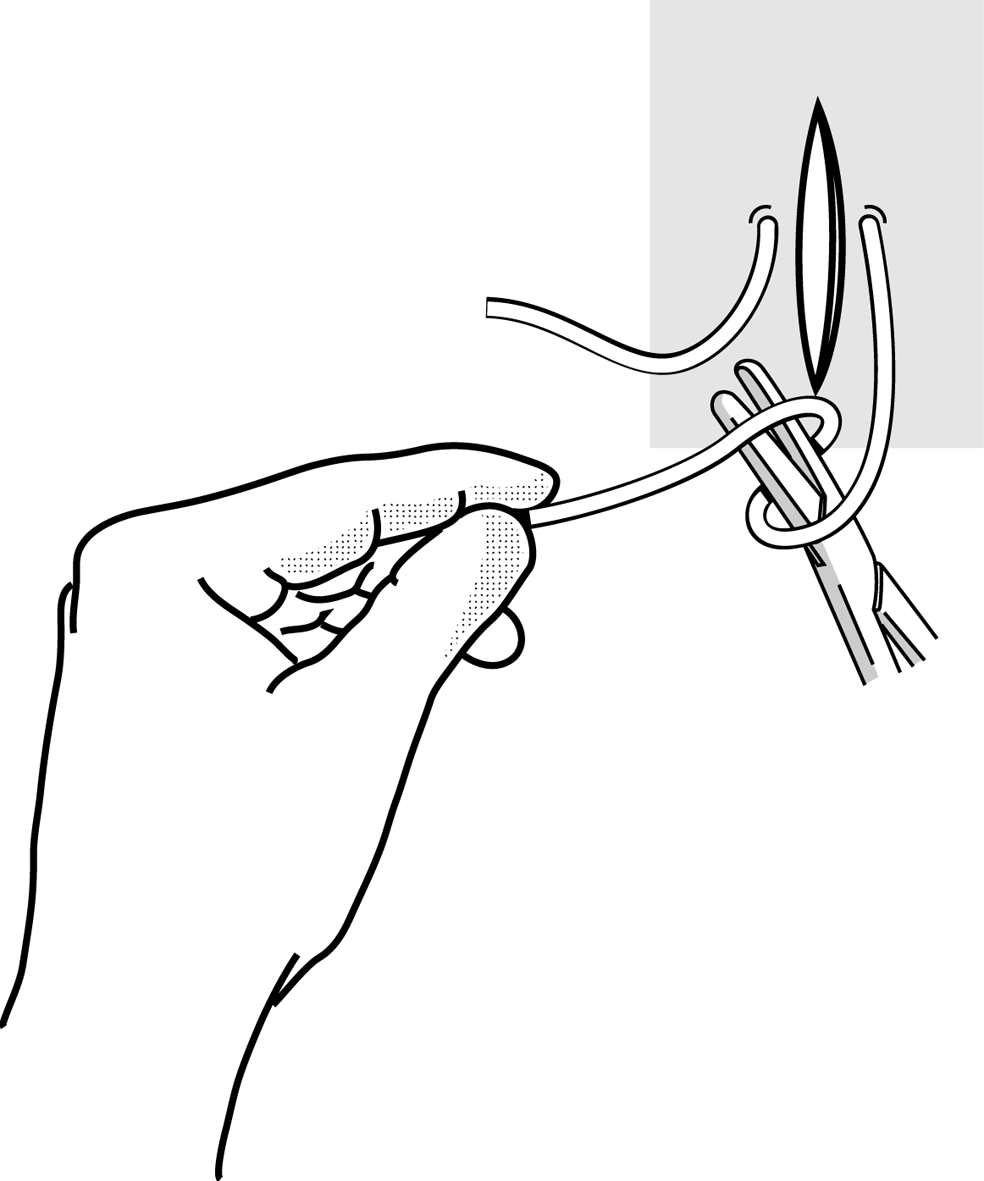 Figure 4e Figure 4e |
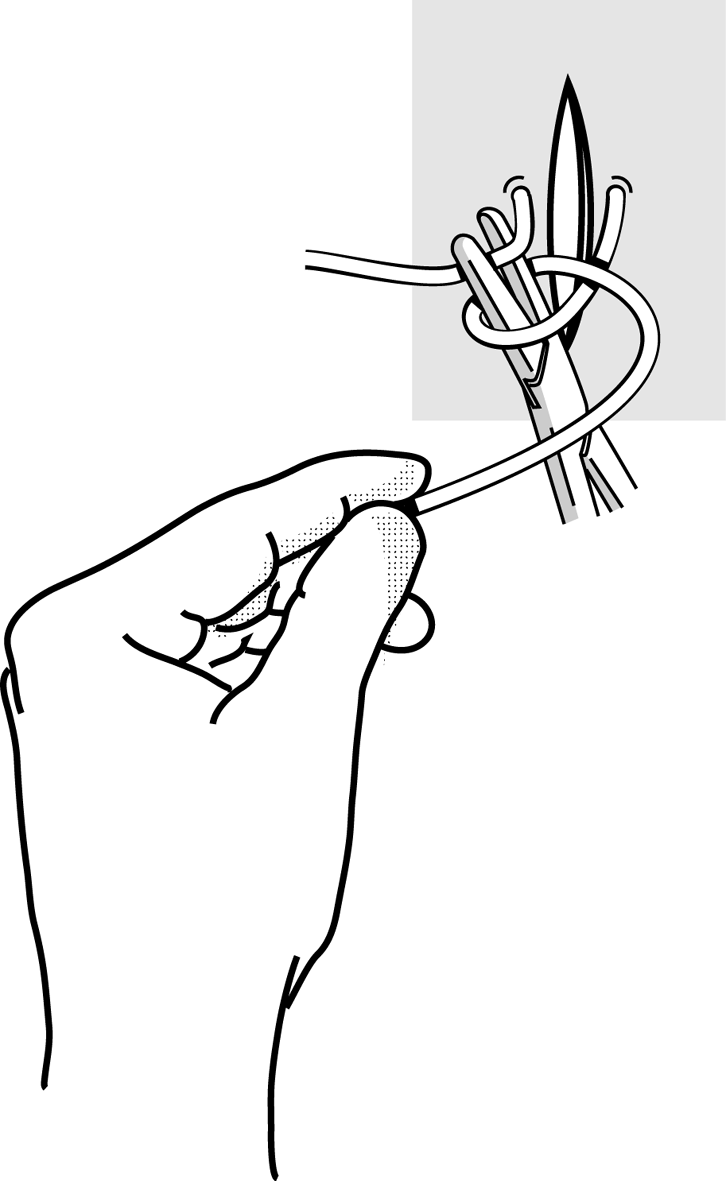 Figure 4f Figure 4f |
|
Grasp the loose end with the needle holder. |
|
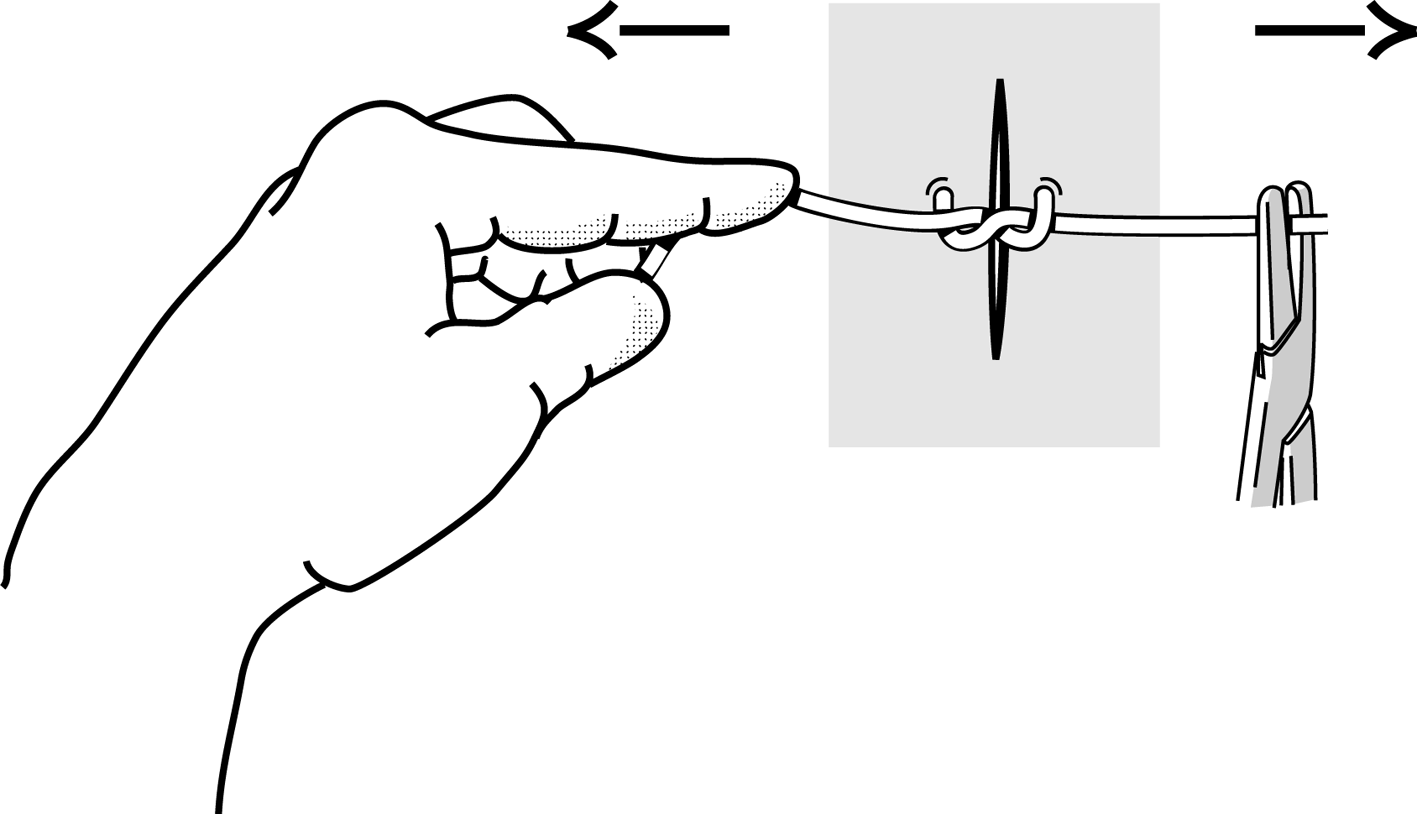 Figure 4g Figure 4g
Fist flat knot. |
|
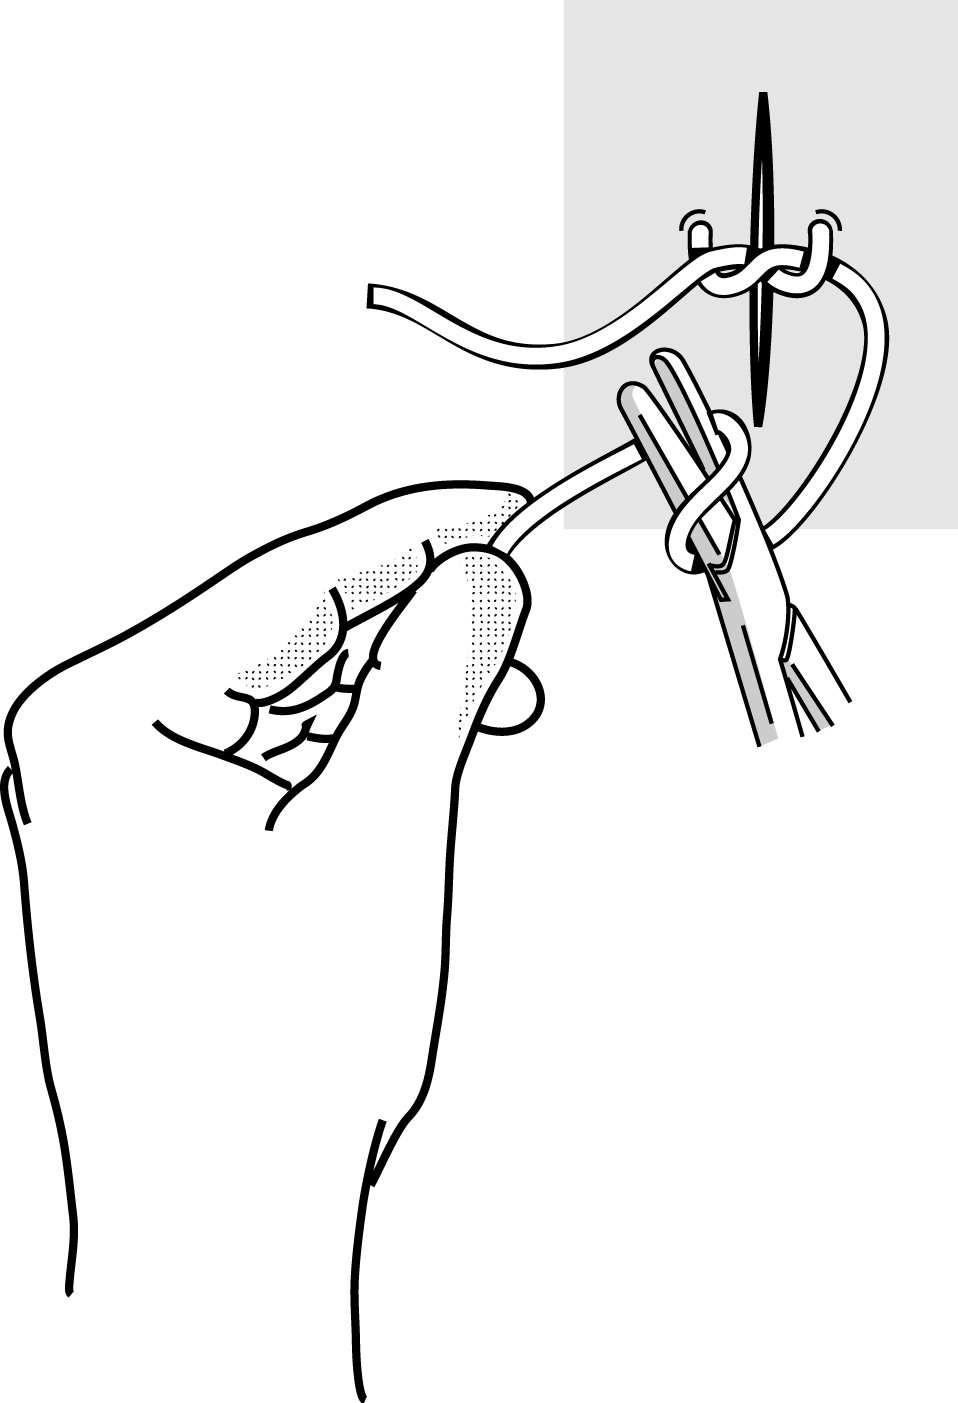 Figure 4h Figure 4h |
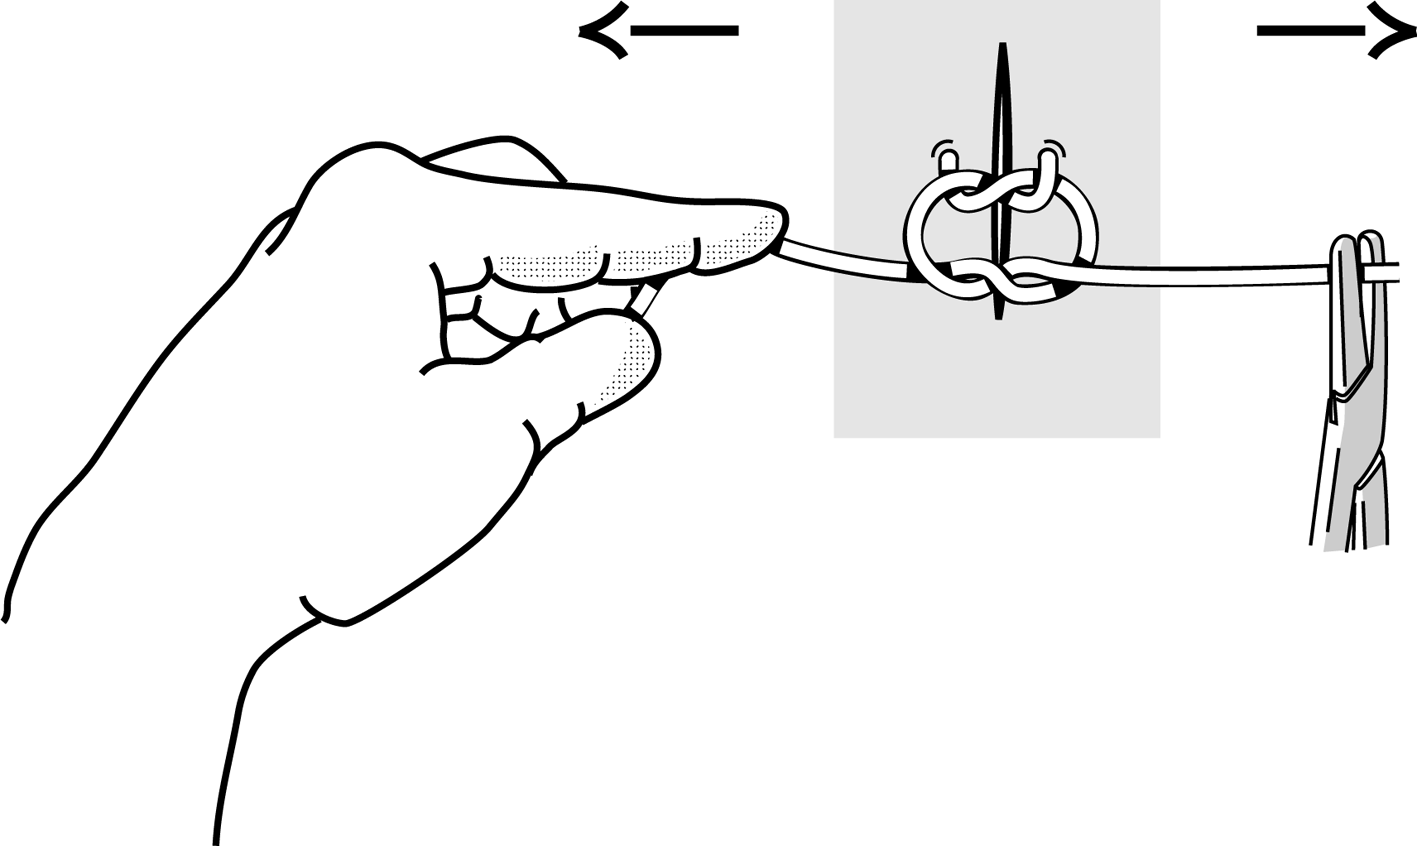 Figure 4i Figure 4i |
|
Second knot in the opposite direction. |
|
Figures 5 : Particular problems
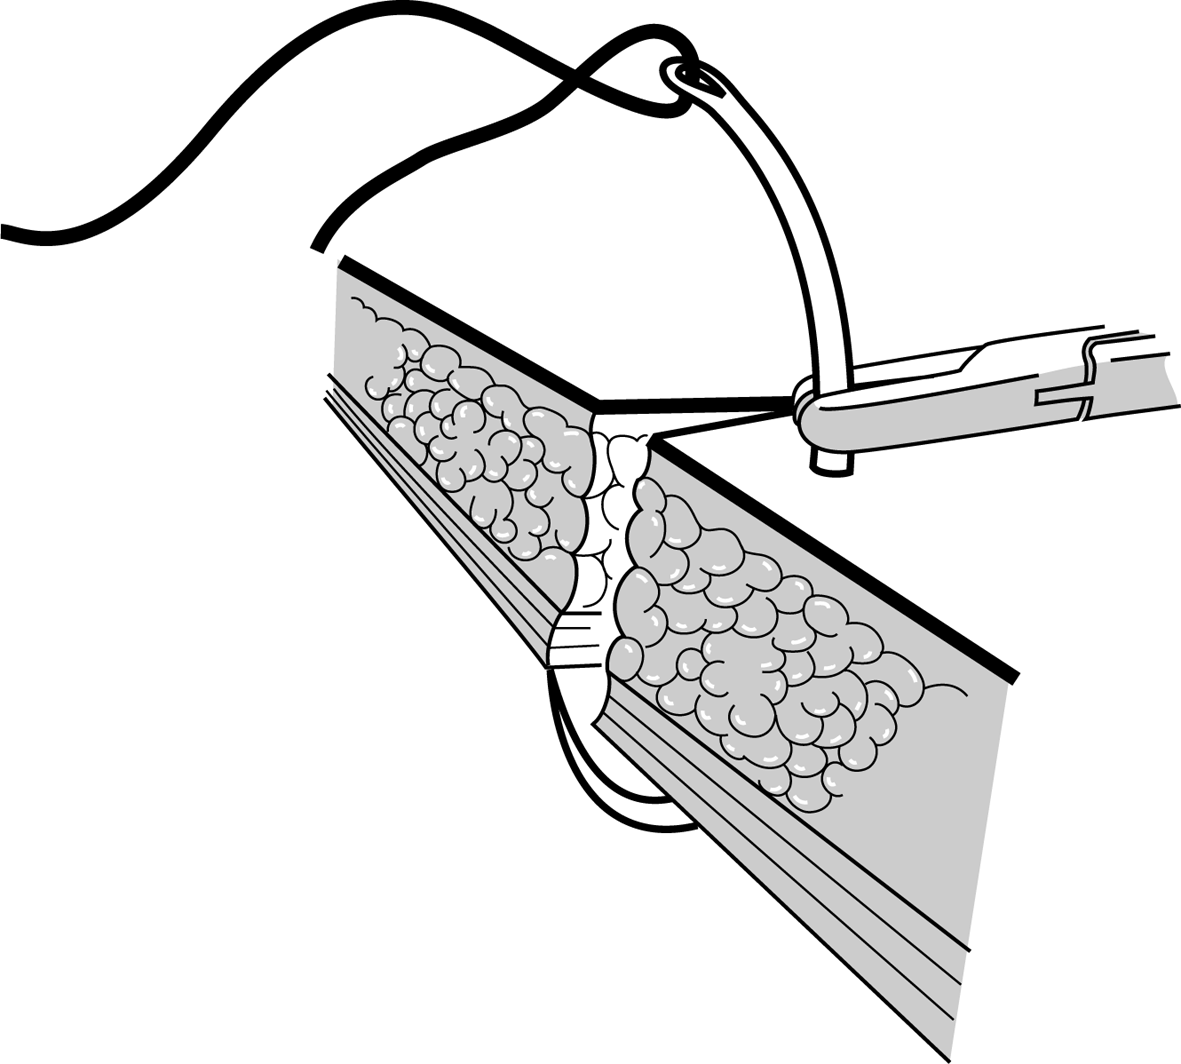 Figure 5a |
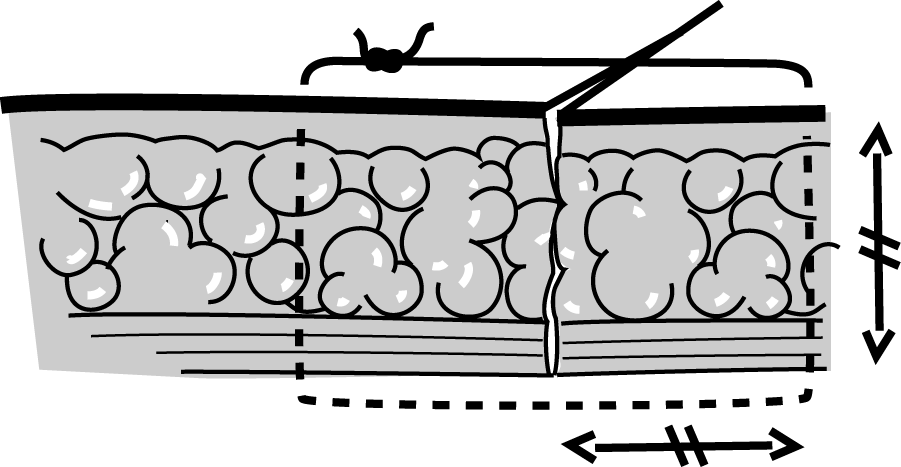 Figure 5b Figure 5b |
|
The suture should be as deep as it is wide. |
|
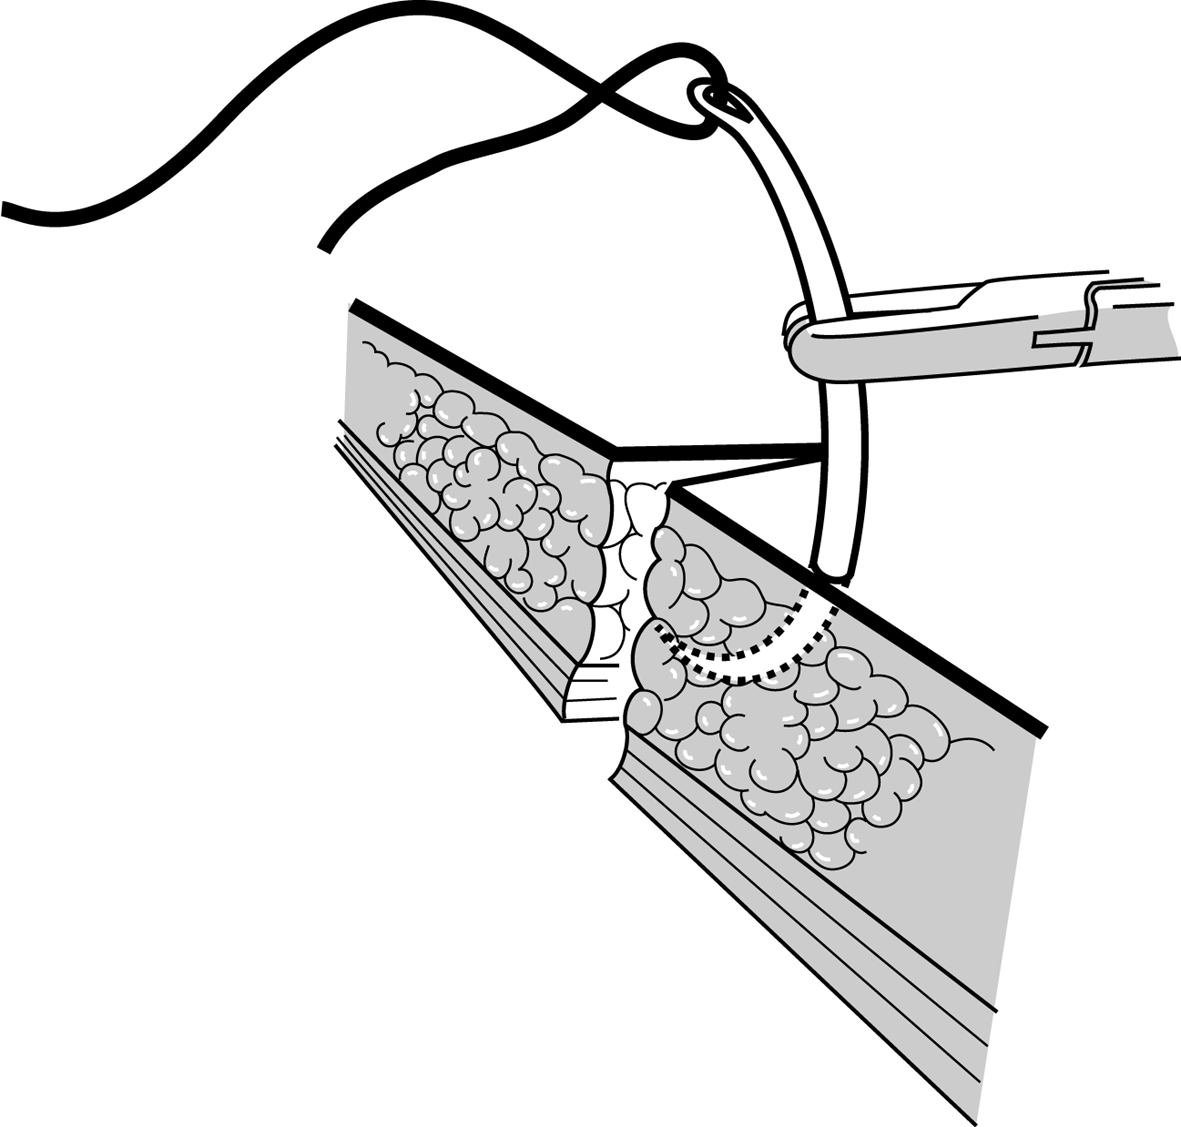 Figure 5c Figure 5c |
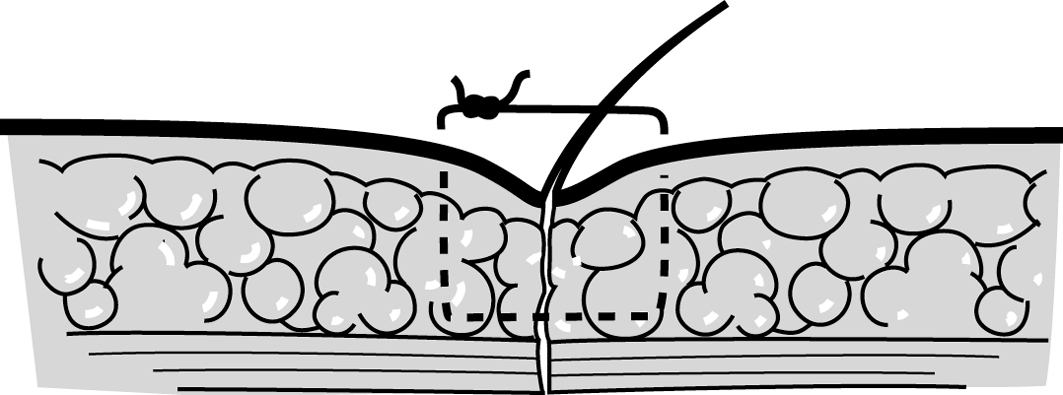 Figure 5d Figure 5d |
|
The suture is too shallow, the edges are invaginated. |
|
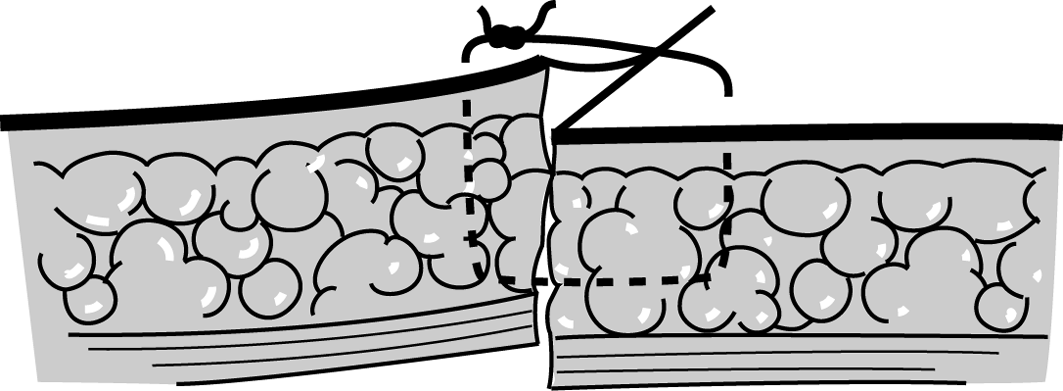 Figure 5e Figure 5ePoor lining of the edges. |
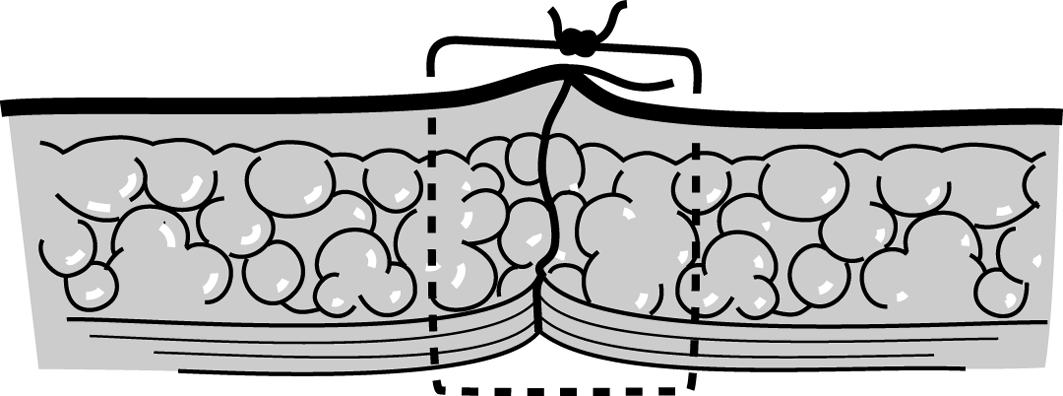 Figure 5f Figure 5fDo not make the knot directly over the wound. |
Figure 6 : Closing a corner
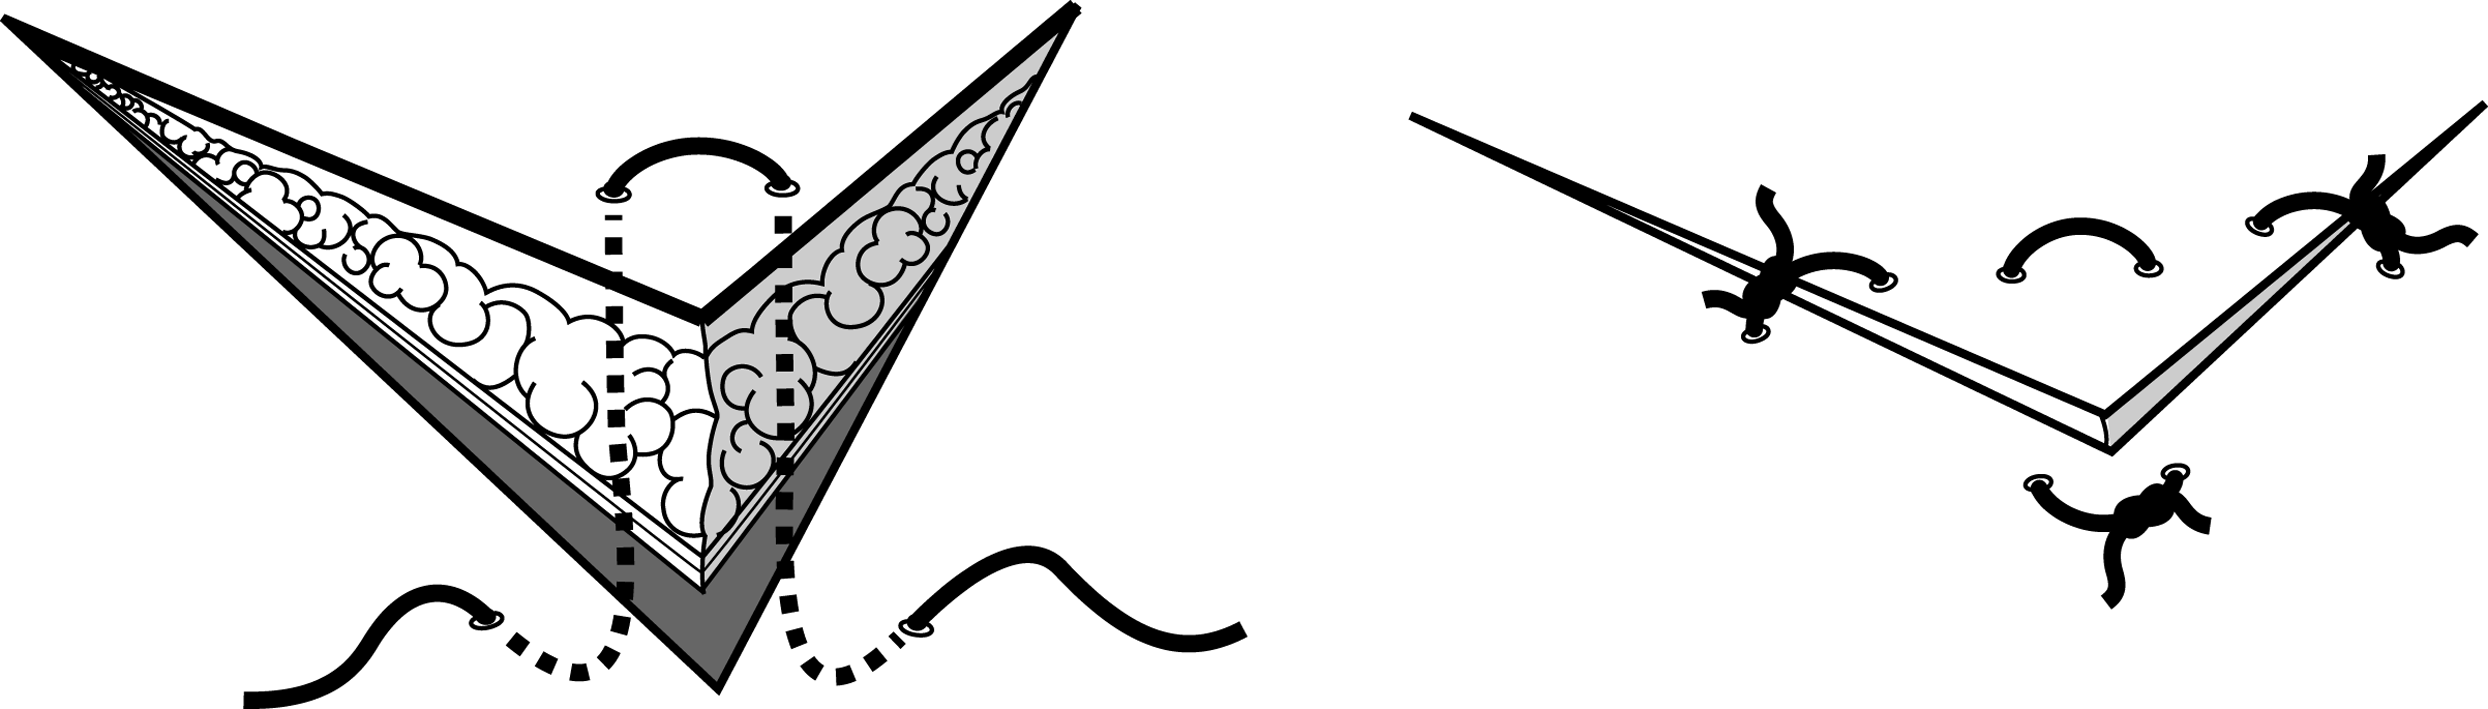 |
Figure 7 : Closure of the skin, simple interrupted sutures with non-absorbable sutures
 |